In the office we tend to deal with documents, agreements, and all manner of paperwork on a daily basis. Sometimes this process, depending on your organization’s standard operating procedures, can seem bureaucratic, daunting, arduous, and sometimes even painful.
When it comes to the resignation of an employee, they must clear every department to ensure company property has been returned, and that they’ve closed every security system they were plugged into. This march of pride, or shame, and collection of signatures is just one example of how paperwork can hang like a dark cloud over our heads.
If you miss one signature because the department head is on vacation, or the IT department took too long to recover your files from the deepest corners of the company server’s abyss, you will have to return the next day; and if that’s on a Friday, then you will be returning on Monday. Onboarding new employees follows a similar procedure in a number of companies, as do many other processes regarding corporate workflow. What happens if the signature sheet gets lost, destroyed, or eaten by the office prankster?
Would it not be easier to let the departments sign everything electronically, or to allow a logistics request to follow a signature workflow in the order in which the process must be approved? We have got you covered.
You see, not only does airSlate help with workflow, workflow automation, document organization, file management, audit trails, and so much more; our system is natively hardwired for eSignatures.
How to create an electronic signature
Within airSlate, the process of creating an online signature is really simple, with a few options to choose from. We will discuss how to make electronic signature fields, and how to set-up your documents for your clients to sign PDFs online shortly.
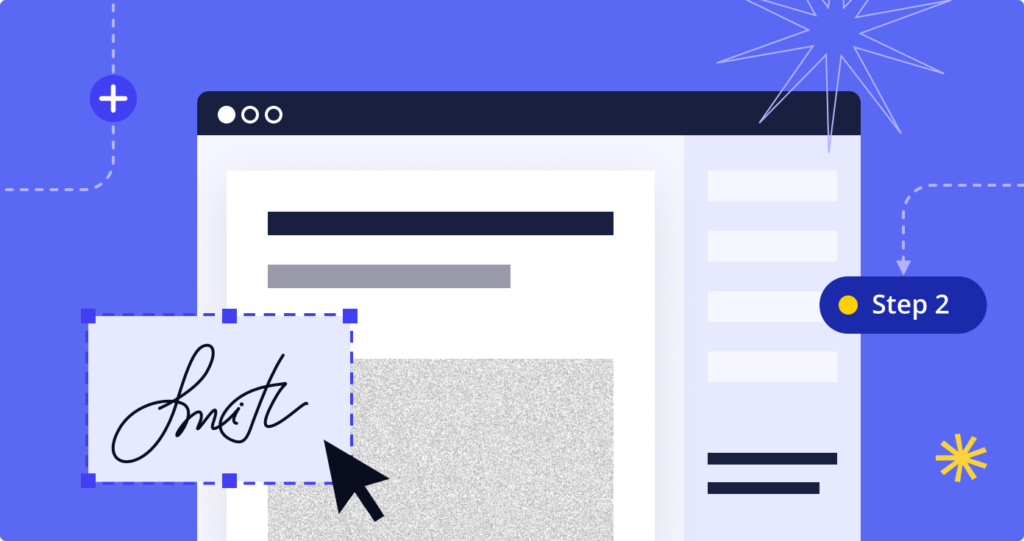
When you are the recipient of a document, or are the creator of one, you can select the Signature field. When you do this, you will be greeted with the Signature Wizard pane. Within this pane you can type your signature, draw your signature, upload your signature, or capture your signature from a mobile device.
Typing your name results in a cursive font representation of your name, and is considered a valid eSignature. Alternatively, if you draw your signature on PC with your mouse you only need to click-and-drag where appropriate. You can also draw your signature on mobile which will result in more fine control in the appearance of your signature due to hand-eye coordination. A fine example of modern art drawn with a keyboard and mouse can be found in the image above.
An uploaded signature is a pre-drawn image like you might have seen on some forms in the past. The result is more or less the same as that of the drawn signature, albeit, it may have also been performed using a signature pad with a stylus.
Capturing your signature on mobile is as easy as drawing it on a clean sheet of paper in a well-lit room, and taking a picture of it.
When you are ready, press Save and Use to place your new signature. If you are working with airSlate and have an account, your signature will be automatically saved for you to choose from later. This saves you from needing to create a masterpiece, like the signature above, every time.

That’s really all you need to know about how to do an electronic signature online using airSlate. Once you’ve completed entering the other data that was required of you, you are done.
According to the ESIGN Act, your online signature is valid, and the process to sign legal documents online is complete. The ESIGN Act covers most use cases, with notable exceptions; which are (as of September 2020, prior to the yet-to-be-voted-on ESIGN Modernization Act):
- Wills
- Codicils
- Testamentary Trusts
- Adoption
- Divorce
- Family Law
- Court Orders or Notices
- Official Court Documents; or other documents in connection with court proceedings.
- Cancellation or Termination of Utilities
- Acceleration, Repossession, Foreclosure, Eviction, the Right to Cure for rental agreements of an individual’s primary residence
It is true you cannot sign everything with an eSignature but almost. With those being mostly personal issues, unless your business relates to legal matters related to the above mentioned bullet points, you should not run into many scenarios that prevent you from doing business digitally.
So, we can sign documents online, and the process to create an online signature is pretty easy. What is next?
Setting up your airSlate Flows to capture a PDF signature online

This guide is going to assume that you have at least some knowledge of the platform; if you have any issues, please visit our youtube page to find a quickstart guide from one of our playlists. If you have more advanced problems, please visit our Help Center.
For this process, we are going to use a standard model release form. This form is one of many variations that professional and amatuer photographers, magazines, and modelling agencies use before taking any pictures. It is legally binding and defines the copyright and ownership terms of the images captured during the photo session. Every model, modelling agency, clothing line, and magazine has seen this document in some shape or form.
When arranging our documents we typically need information like names and addresses to prove the authenticity and identity of the individual in a court of law, and to provide the courts or lawyers with enough information to contact the individual should the terms of the agreement be breached. For example, should the model decide to sell the images they relinquished ownership of as posters; it may undermine the profitability or brand image of the magazine or agency who hired the model.

To accomplish the task of adding a field to your document, you can select either a Standard field and give it the properties you want or a flow template field which has already been constructed to save you time.
In our case, we want to add a Signature field, so we will click-and-drag it onto the document. Drop it wherever you need it to be; you can move it by clicking-and-dragging it around the document.
If you have one or more fields on the document already, a red dotted line will appear and help you align your fields in relation to the others with a snapping function.
When you have selected a field, you can resize it by selecting its corners where your mouse cursor will change to diagonally pointing double arrows. You can resize the field how you like, and the next field of the same type that you place will retain that size and shape.
Additionally, to delete a field, the Delete button on your keyboard won’t do the trick; select the field and press the trashcan icon to the right of it.
Since today we are focusing on how to create an electronic signature, and how to sign documents online, let’s go to the Signature field and go into more detail.

When you have successfully placed the Signature field onto your document, select it. On the right panel, where we earlier found the available fields, we will find some settings.
First of all, remember Database field name, it will be very important in a few minutes.
By adding some text to help, we are adding some information that will help explain what the user or signator must do when they are filling out the document.
Fields are not marked as required by default, this is to prevent making a document impossible to finish if the individual setting it up forgot to adjust the settings for every field. Some documents can have hundreds or thousands of fields, it is better to operate on the side of caution!
Making a field conditional allows you to create conditional logic to hide or reveal this field based on previous input. The system is very robust, we will visit that soon.
Under Advanced you will find Note, and lastly the options for your online PDF Signature.
Under these settings, you can allow or restrict different types of signatures based on the requirements set forth by your organization, country, or personal preference.
Once you have ticked and unticked the boxes to meet either your preferences or needs, you are done! The field is ready and waiting for your signator(ies). Of course, we still need to send out our Flow and discuss conditional logic.
Digital versus electronic signatures
Before we do that, let’s take a moment to talk about the difference between electronic and digital signatures. Often, when searching the internet for solutions for how to create electronic signatures, a person might use the search term “digital signature online”, for example, because they do not understand the difference between the two. But that is common.
An electronic signature has a more loose process than its digital counterpart. However, an electronic signature must have records attached to it such as IP address, time, date, and service provider. Additionally, instructions on what software and hardware requirements are needed to access the documents after they have been electronically signed should be posted and updated as needed.
While a digital signature in most countries is required to also have an audit trail, it is not as simple as drawing in an app or typing your name.
A digital signature is an encryption system in which the sender must encode their document, send the results of the encoding and the original, and attach a public key, or a digital certificate which also includes their public key but also authenticates the identity of the individual via a Certificate Authority. The recipient then uses a special program which compares the results of the encoded document against their own encoding of the original they received using the public key the sender sent by itself or as part of a digital certificate. If it is a match, the signature is valid.
Digital signatures sound like a lot of work, do they not? The process is mostly automated but the tools and cost of such tools can reach deep into the pockets of consumers and enterprise clients.
E-signatures are legally valid in many countries, such as the United States under the ESIGN Act. Whereas in places like the European Union, one must defer to the rules of eIDAS and apply digital signatures. Digital signature laws do have variations from member state to member state of the EU, so please make sure you are in compliance with local and EU law before you make any sudden moves or major decisions in the realm of digital business.
Sending out a PDF with an electronic signature

When we hit Done on our document we will be greeted with a new pane which allows us to set up our signers. Because our model release form has three to four signers, depending on the circumstances, we will need to press Add Recipient a few times.

Before we do that, let’s take a quick look at the access settings that are available to each recipient. We can set it so that they can only view or fill the document, view and add comments, or fill and comment on the document. Comments are a great way for teams to collaborate and improve their Flow, for clients to add mentions to contract negotiations for revision, or to remember certain details like when filling out government forms that do not describe things very clearly.
We have the ability to revoke access when the recipient has completed the document, this can help to eliminate errors and issues after the document has already been completed. We can also add a Personal message that is unique to each recipient; which is a great touch for client rapport, adding instructions, or adding any additional information.
When you have added the email addresses that belong to the recipients, each of them will be able to fill all of the fields in the document if you have not assigned fields. This can be a problem for a variety of reasons, so we need to assign fields.

Do you remember how we mentioned earlier about naming fields? This is where it becomes important.

When adding fields to the document, you can name them whatever you like. Though, for organizational purposes, we recommend prefixes. In our example we have our model, photographer, witness, and if the model is 17 or below, we need their legal guardian’s information as well.
For every field the photographer is required to complete, we added Photo followed by an underscore; for the model we used Model. It might seem a little silly until you have several signers, hundreds of fields, and/or need to implement conditional logic.
Once we have named all of our fields, we should go back to the recipients pane by hitting Done.

When we press Assign fields now, the task is not a guessing game. We can scroll through our list and select the ones appropriate to each recipient and it will also show us if a field is already assigned to someone.
Once done, all we need to do is click Send. The rest is just a waiting game for us.

Filling out a form

If you are a recipient of a Flow from your team, just login and from the Dashboard navigate to Incoming Flows, which will have a notification icon next to it if you do. Press Edit to fill it out.

And do not worry, recipients will receive an email as well, regardless of if they are an airSlate user or not, and regardless of whether they are your team member or not.

Filling out the form is as simple as typing in the information required of you and placing your electronic online PDF signature where needed.
Codeless conditional logic and fields
When talking about conditional logic, the above advice stands, name your fields; it will make this process a lot easier for you.

In our situation, we do not necessarily need the witness to sign twice, and we do not need the model’s signature if they’re underage; we need the legal guardian’s signature in this case. Because we need to mark certain fields as required for the document to be legally valid, we cannot complete it once it is in motion if certain conditions are or are not met.
If our model is over the age of 18, then we do not need the legal guardian’s fields to be filled; likewise, if we have the legal guardian’s signature and information, we do not need the model’s signature or the first witness fields to be filled. So what can we do about that?
If you select a field and turn on Make this field conditional, a small pane will open up allowing you to choose from a range of settings. This tool is very powerful and very simple. Let’s get to it.
We need to hide, and thus skip, certain fields based on a set of conditions. Firstly, we need a check that shows whether the model is above or below the age of 18. When it is marked, the model is above and we do not need the legal guardian’s information or the second witness fields.
This sounds like circle logic, but bear with me! We are going to make a chain of conditions that flows smoothly.
When the 18+ tick is checked, we hide the legal guardian’s name field; and if the legal guardian’s name field is empty, we hide the second group of witness fields. If the tick is unmarked, the legal guardian’s name field is revealed and if it has something filled in, the rest of the legal guardian fields become revealed. Additionally, the first witness field group is hidden, the second witness field group is revealed, and the model’s signature field is hidden.
Phew! Have we mapped that out with our minds? This chain of events gives us the freedom and ability to make robust contracts, forms, questionnaires, negotiable documents, and so much more with complete and total automation once we have set it up. We do not need any code, just a flow chart of what we want to accomplish, if it is a complicated matter.

When we select a field and make it conditional, we have a few options to go through. First of all, there is a small dropdown menu which is grayed out and inaccessible if we only have one condition. We can add more conditions by pressing the + button at the bottom of the pane. The reveal conditions can be:
- Any of the following
- All of the following
- None of the following
- Not all of the following – not-or logic
Under this, we can find two more dropdowns, the first of which is a list of every field on the document. If we have a number of the same type of fields, this can become quite the complicated procedure; name your fields! The bottom dropdown menu has two choices; filled or not filled.
Let’s revisit our logic example and set up our chain.
Our checkbox is named Age. We will select the legal guardian’s name field and make it conditional, select our field Age, and make sure it is set to is filled in. Next, we will visit the first witness fields group and model’s signature fields and make them conditional, select the LG_Name (legal guardian’s name) field and choose is not filled in. Lastly, we will go to the second witness fields group, make it conditional, select LG_Name again, and select is filled in.
That’s it, our logic is implemented. We do not need to do anything else, everything is intertwined and flows from the checkbox. Because of the signing order, we need the legal guardian to sign before the witness, therefore, we have arranged everything correctly in the document.

Now when sending the document, to maintain the correct document flow, ensure that Set signing order is enabled, put the witness last, the photographer first, the model second, and the legal guardian third.
When the photographer fills in the location and date information, he or she will deal with the checkbox and everything will flow from there. That’s it, it is really quite simple.
Editing your Flows
Well, that logic seems sound, but maybe we made a mistake! So what can we do?
Every time you create a new Flow, the sequence of Steps in a workflow is automatically generated, so the first thing we need to do is delete any existing workflows based on that Flow. This requirement makes sense, it means that no one using airSlate can change the conditions of a contract or agreement after it is already been signed. It protects you and it protects consumers.

To find our Flow, we can go to our Dashboard and either find the template in our Recents or in All Templates. Then by selecting the three-dotted button on the correct template, select Configure Template.

This will take you to the first page you were on when configuring your workflow, where you can add documents, forms, surveys, contracts, spreadsheets, welcome forms, authentication forms, request attachments, or process payments.
If you do not have any workflow sequence set up for this Flow, you can select Edit Fillable Fields to return to the editor and fix your conditional logic, correct mistakes, or whatever it is that you need to do.
You might be wondering, how in the world did we end up here? The answer is quite simple, let’s do a brief overview to get you Flowing.
Create a new Flow

On your Dashboard, you will find a button titled Create New Flow on the top-left. You can save it as a Template later by clicking the respective button.

Initially, you will be greeted with an Add documents box with the ability to upload or import documents. Import sources can be:
- Your computer
- pdfFiller
- signNow
- Dropbox
- Google Drive
- OneDrive
- Box
- SharePoint
You also have the ability to select Create and choose from the following:
- Form or Survey
- Document generation
- Contract
- Welcome form
- Authentication form
- Request attachments
- Accept payments
- Document placeholder
Let’s check out Request attachments first.

The Request attachments feature allows you to request, and if necessary to mark it as required, documents, images, or files from your recipients. If you are using this Flow Template for job applications, you could request a copy of their curriculum vitae, resume, driver’s license, visa, photograph for internal security ID cards, or whatever it is that you need to accomplish the mission.
Next up is the Authentication form.

The Authentication feature allows you to verify the identity of your recipients through their Facebook or Google account, email address, or phone number. This can be useful when dealing with contracts, job applications, sensitive proprietary information, etc.
The rest of the available features are all just as simple to set up and get moving.
When organizing your Flow, order is important. You can easily reorganize the order in which documents and forms are shown to the recipient by clicking and dragging them into position using the move button.
Uploading PDF documents into Flows
If you have opted to upload a document, such as to add signatures to your PDF online, you will be greeted with the editor you saw before.
You simply need to click and drag the appropriate fields into the proper locations, name your fields for organization and ease of use, and setup if they are required, what information they can accept, add conditional logic, and more.
Each field type has its own settings, parameters, and uses; for example:
- Text can be used for anything requiring alpha-numeric input.
- Number accepts only numeric characters which are up to 14 characters long. This can be handy for prices, quantities ordered, or the amount of hectares an agronomist has at his disposal. it is really up to you.
- Radio Button and Dropdown allow you to make selectable choices on your document which can then feed into conditional logic. For example, if you need to know what county from your state an applicant resides in; if they live too far, you can expose the option for them to opt into a carpool or fuel compensation program.
- Checkbox allows the recipient to mark boxes on forms in a quick and easy way which can also feed into conditional logic to expose or hide fields, like in our previous example.
- Formula allows us to set up mathematical equations for use in contracts, for calculating tax costs, fuel expenses, per diem claims, and so much more.
- Initials and Signature allow us to gather approval, consent, and/or verification from the recipient.
- Image allows us to get an image from the recipient, which could be identification or anything within the realm of your imagination.
- Date is the date and/or time in which the document was completed.

The Template fields are fields which are pre-made to help speed up your workflow. For example, the US States Collection is a dropdown menu listing the abbreviated version of every State within the United States of America.
In addition to this, we also have Template fields for:
- Full names
- Email addresses
- Company name
- Job title
- US phone number
- Zip code
- USD (US Currency)
- Euros (EU Currency)
- Age
- Social security number (SSN)
- Employer identification number (EIN)
- Credit card number
- Gender
When you have finished your document, logic, naming your fields, and feel it is ready then you can save it by pressing Complete on the bottom of the page. You will be returned to Flow’s Template page. You can add more steps until you feel your configured workflow is ready for the world.
When you are done, you can save it and return to the Dashboard by clicking on Go to List of Flows where a Flow will have been automatically generated for you.
That should cover the basics of getting from the Dashboard to a working with Flows.
Bots, Bots, Bots, everybody loves Bots!

One last thing before we go, we have a feature in which our Bots handle automation for you while you sleep, play golf, or walk around with a clipboard pretending to make notes about anyone who comes near so nobody bothers you on a Monday. The list of available Bots is inexorably long and we do not have the space on this page to keep going at-length. The basics of our Bots is that you can set up a wide array of automatic functions like exporting documents to Google Drive, contract negotiations, email notifications, and so much more. Even payment processing is hands free. We highly recommend checking them out. In another article we will discuss them at great length.
In conclusion
We have discussed a great number of topics today. We discussed the legality of eSignatures online, how to get our electronic signature on a PDF. We also touched on the difference between digital and electronic signatures and the names of the laws governing them. We discovered how to create and set up a new Flow, sign a document online, and so much more.
But don’t think that you are the only organization thinning about using airSlate’s workflow automation tools. Join the millions of others who are already using airSlate to streamline their working processes daily. Companies like TechData, AGMEN, FirstData, CBS Sports, and so many more.
We really appreciate your time and attention to this article, we hope it was helpful to you and your team. If you have any questions, do not be afraid to reach out to our Help Center, we are here to help you enhance your workflows.
Contact us to explore the possibilities of business automation with airSlate.
Fill out the form below to request a free demo!
- How to create an electronic signature
- Setting up your airSlate Flows to capture a PDF signature online
- Digital versus electronic signatures
- Sending out a PDF with an electronic signature
- Filling out a form
- Codeless conditional logic and fields
- Editing your Flows
- Create a new Flow
- Uploading PDF documents into Flows
- Bots, Bots, Bots, everybody loves Bots!
- In conclusion