Workflow automation vs. Workflow scheduling: Boost your efficiency with a new airSlate Academy course
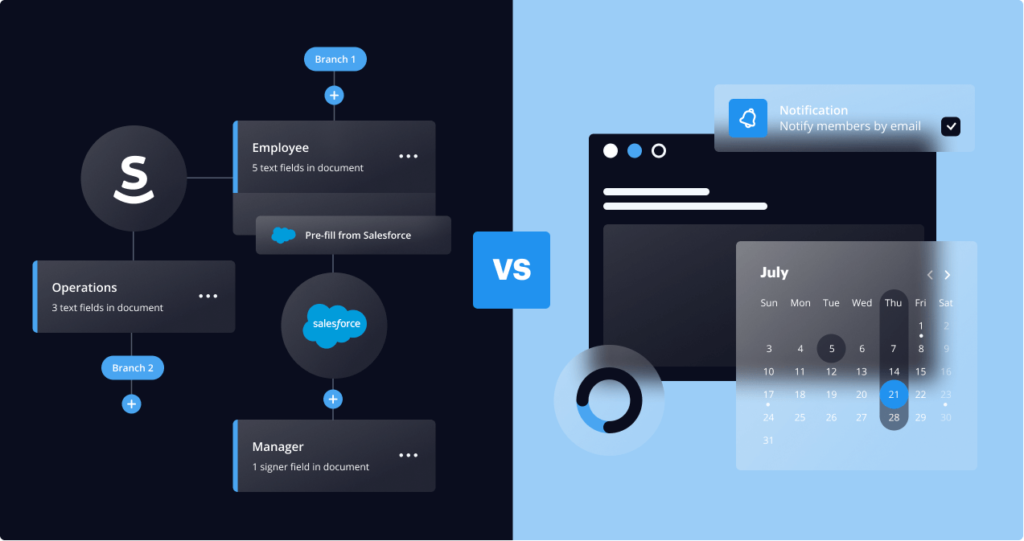
As businesses transition to operating in a post-COVID reality, workflow automation is becoming a necessity. Today, 80% of business owners see automation as a top tactic to achieve IT cost optimization.
The boom in workflow automation technologies has led to the use of automatic workflow scheduling, saving time and resources for more significant business tasks.
This blog will walk you through the concept and positive aspects of workflow scheduling as a part of workflow automation. You will also learn how to create scheduled workflows in airSlate using the free course at the airSlate Academy.
Workflow automation vs. workflow scheduling: What’s the difference?
Workflow automation entails delegating entire tasks or their parts to workflow automation software. Workflow automation allows for saving time and employee resources, as well as eliminating all the hassle involved in routine manual processes. Modern-day low-code/no-code workflow automation software typically includes built-in features that require some basic knowledge of coding or none at all.
Teams and businesses want to work smarter, not harder – hence, they’re looking to use efficient and affordable tools that boost their productivity. In the past, employees spent hours organizing meetings, emailing invites, calling or sending messages to the participants to remind them of documentation pending their signatures, etc.
Today, setting up a timetable to automate routine tasks is no less important than planning budgets and campaigns. The time-based workflows feature within airSlate’s document workflow automation tool, allows for fast and convenient workflow scheduling.
The terms “workflow scheduling” and “workflow automation” are often used interchangeably, which can cause confusion, especially among people new to both concepts. Let’s make sure we’re on the same page before we delve deeper into the differences.
What is a scheduled workflow?
A scheduled workflow is a business workflow pre-configured to start running at a specific time or based on a certain condition. When using document workflow automation software, you can set up the autostart for your workflows based on changes in forms and agreements, spreadsheets, or CRM records.
This way your workflow will run with a single click of a button or automatically in accordance with the conditions you’ve defined. The main condition for autostart is a specific date and time. Such processes are called time-dependent, or time-based workflows triggered by the scheduled date.
When you schedule a workflow, you need to do all the preparatory work for the task to run successfully. Basically, doing something in advance and scheduling it to run later. In particular cases with scheduling, you might need to perform a task every time you need to run it. For instance, with scheduling social media posts, you still have to enter content in every Facebook post and tweet that gets posted – they just get posted later, but in some social media scheduler, it does not require more.
With workflow automation, however, things look a bit different – you pre-define the workflow conditions once, then it runs repeatedly. The major difference lies in how much effort you put in and when. While workflow scheduling may require putting in a little effort over and over again, workflow automation entails pre-setting the steps upfront, but all the work is completed at once.
The best workflows for scheduling are those that require manual effort with a certain level of customization, or else you’d automate it completely. Also, you can schedule custom or infrequent tasks and/or workflows, i.e. invoices for customers.
What are the positive aspects of a time-based workflow?
Setting up time-based workflows is a perfect solution for teams and businesses that need to organize future recurring events. Using a time-based workflow allows teams to update the lead owner in a CRM or ERP system, automatically initiate a new document workflow, or arrange automatic data collection and data updates based on other active workflows. Here are just a few positive aspects of using time-based automation:
- Time savings. Configuring a scheduled workflow requires minimal time while delivering maximum effect on general performance
- Operational cost reduction. Hours of business time, human resources, and financial costs saved
- Improved document accuracy. Data never gets lost and tasks are completed at the appropriate time according to the team’s plan
- Streamlined workflows. Due to the automatic launch of the processes, most of the regular work runs smoothly and more efficiently
- Human error is reduced. The staff makes fewer errors and can focus on customers and new projects instead of wasting time on routine manual tasks
It’s no secret that many online services offer time-based workflow functionality. While the complexity of their configuration may differ, airSlate offers perfect simplicity-in-use and accuracy ratios that teams and businesses need.
Time-based workflow scheduling in airSlate
airSlate’s Autostart option is an event that triggers time-based workflows in accordance with pre-set conditions. Once you’ve created and customized your document workflows in airSlate, they turn into automated multi-level Flow Templates that can be scheduled and run in a single click.
In our previous blogs, we covered airSlate’s Flow Templates for various industries:
- Workflow automation for Higher Education
- Workflow automation for Healthcare
- Workflow automation for HR and recruitment
- COVID-19 vaccination Flow Templates
For more ready-made workflow Templates used across different industries, please visit airSlate’s Flow Templates library.
To set up a triggered workflow in airSlate, enable the Autostart option in your Template to automatically trigger Flow creation when visualizing your workflow in the airSlate Flow Creator.
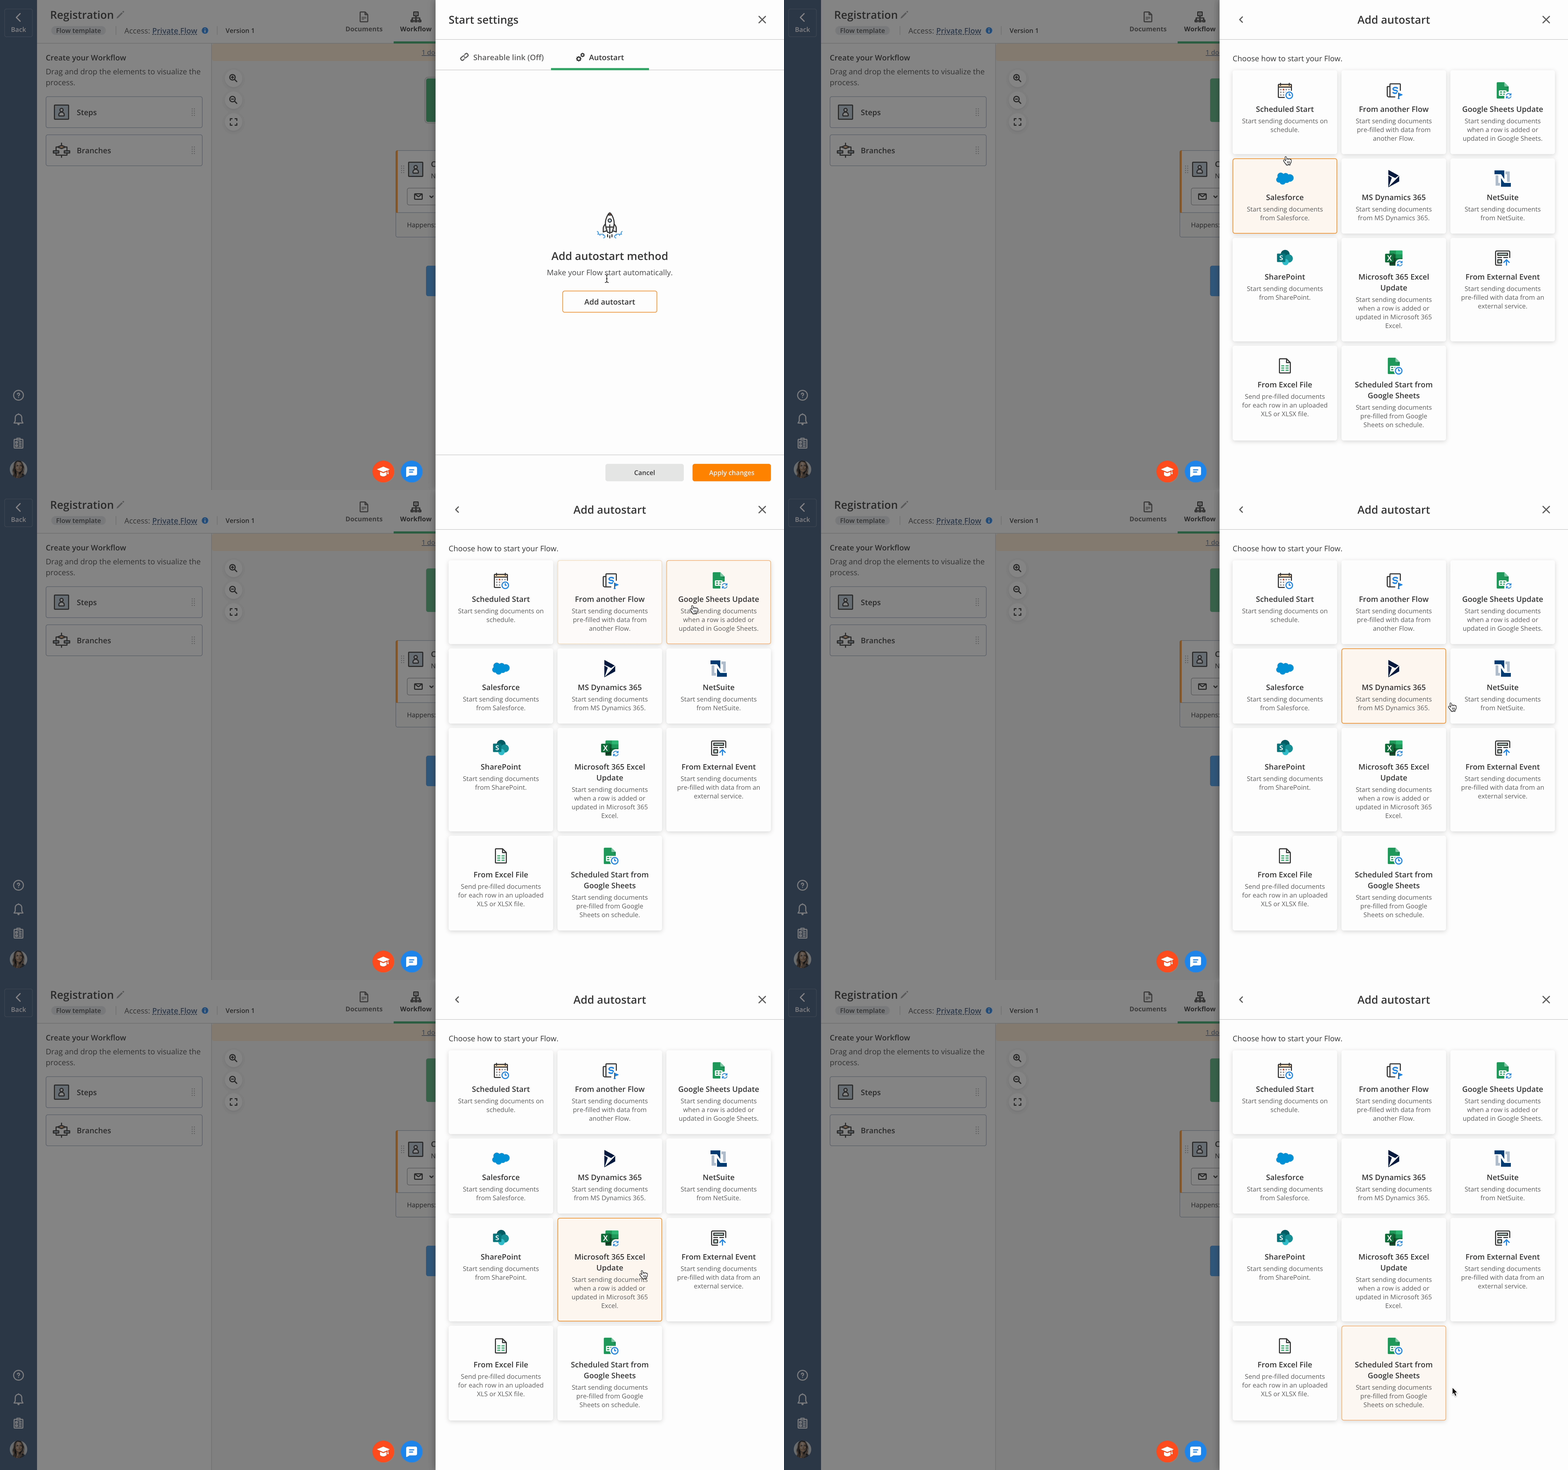
You may adjust an Autostart to run a Flow on a schedule or when your systems of records change, such as in CRM or ERP systems, spreadsheets, and more. Autostart can run Flows on a daily, weekly, or monthly basis, or on a custom schedule.
You can also schedule it to create Flows from another Template’s completed Flows, Flows created every time you update your Google or Excel 365 spreadsheet, or Flows initiated from Salesforce, Dynamics, Sharepoint, and others.
How to auto start a process from Salesforce
In our previous articles, we’ve covered Salesforce process automation using airSlate. The airSlate integration for Salesforce allows for running different document workflows, depending on the Salesforce record data, using custom buttons.
Custom buttons enable Salesforce users to create documents in airSlate and start any automated airSlate workflow directly from Salesforce records.
Custom buttons allow for generating reports, collecting customer data, and processing documents in a single click.
Let’s take a look at how sales teams can benefit from using airSlate’s Autostart feature within their Salesforce workflows. While working with different customers, sales reps have to send them custom reports, sales orders, or invoices that differ for each customer, and they must include different addenda.
Here’s how the Insurance industry benefits from using the airSlate for Salesforce integration:
“airSlate has been a great addition to our business! It integrates well with Salesforce by allowing our team to seamlessly get custom documents ready for signature within our Salesforce record! The automation that follows is top-notch, making it so that our team is not wasting time and resources uploading and saving documents after they are completed.
– Michael Moore,
Also, airSlate’s customer success team has been a tremendous help! From when we first got set up to now, [the team rep] has been able to guide us and ensure that we are using airSlate in the best way possible to suit our needs. He has also helped us tailor a few things to fit our company’s needs. Great product and superb customer service!”
Insurance Advisor at Transition Insurance Agency
With airSlate, you can easily generate each of these documents automatically in a few clicks:
1. Install and configure airSlate for Salesforce
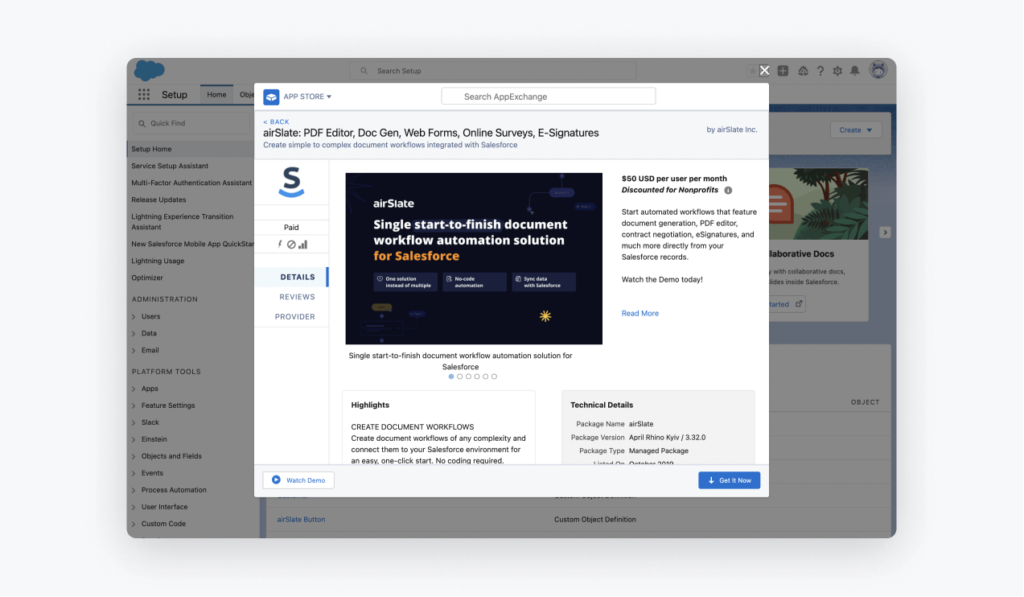
Visit the AppExchange to install the airSlate for Salesforce app into your Production or Sandbox environment. Once the app has been installed, go to the Salesforce App Launcher and open the airSlate Admin Tools. Follow the configuration wizard to connect your Salesforce organization to your airSlate Workspace.
2. Create a Template
Create a new Template from scratch, create a new Version, or pick the one you have been working on.
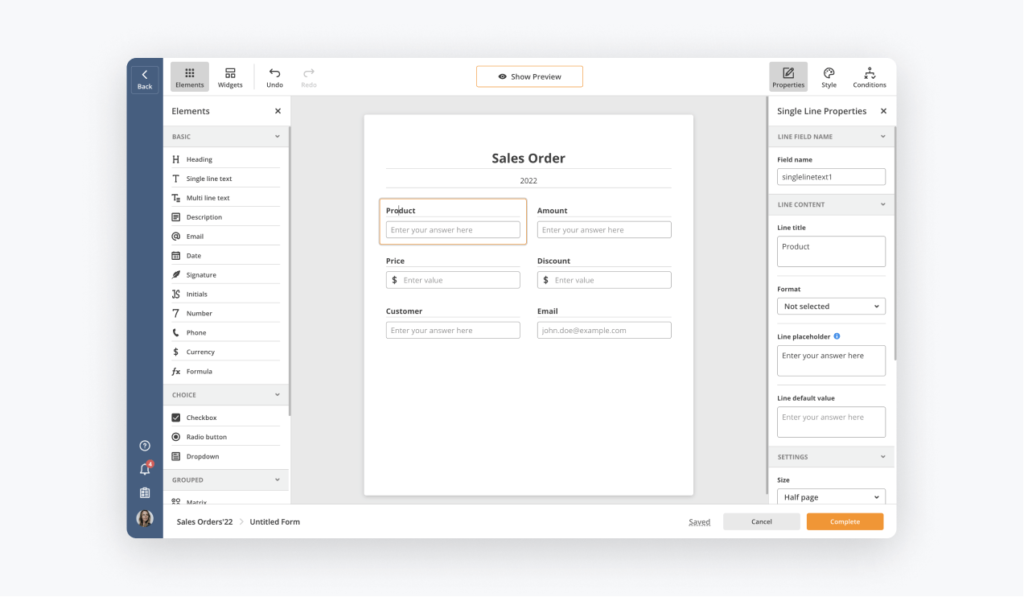
3. Add and customize document templates
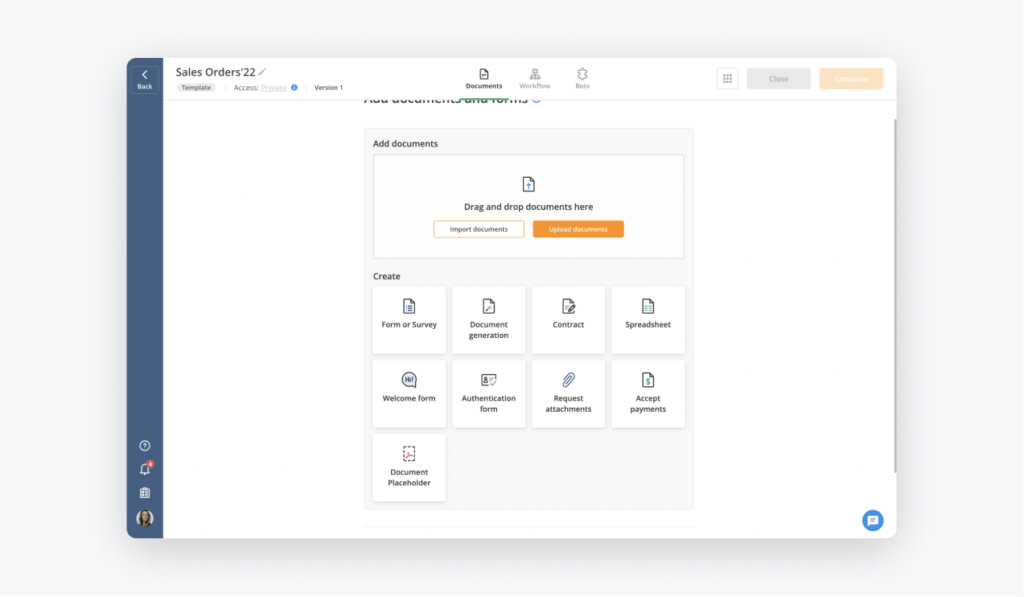
Once you’ve created a Template, add and edit documents that will be used as document templates. There are different document types you can upload from your computer, import from the cloud, or create from scratch.
4. Design your Template
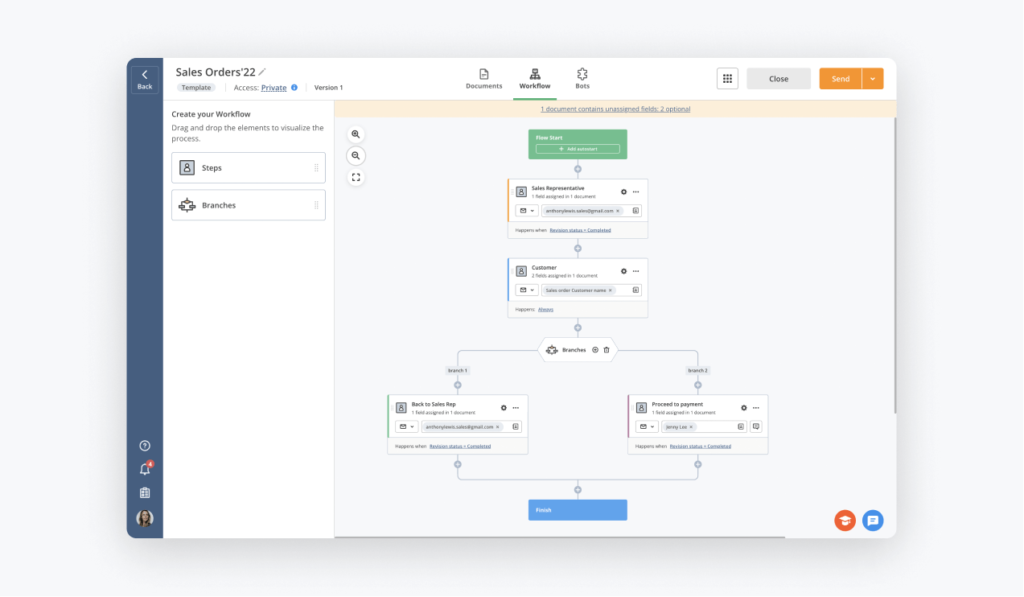
As soon as you’ve added at least one document to your Template, the Workflow tab will activate and you can visualize your entire Flow by dragging and dropping the necessary elements — Steps and Branches.
5. Set up automation
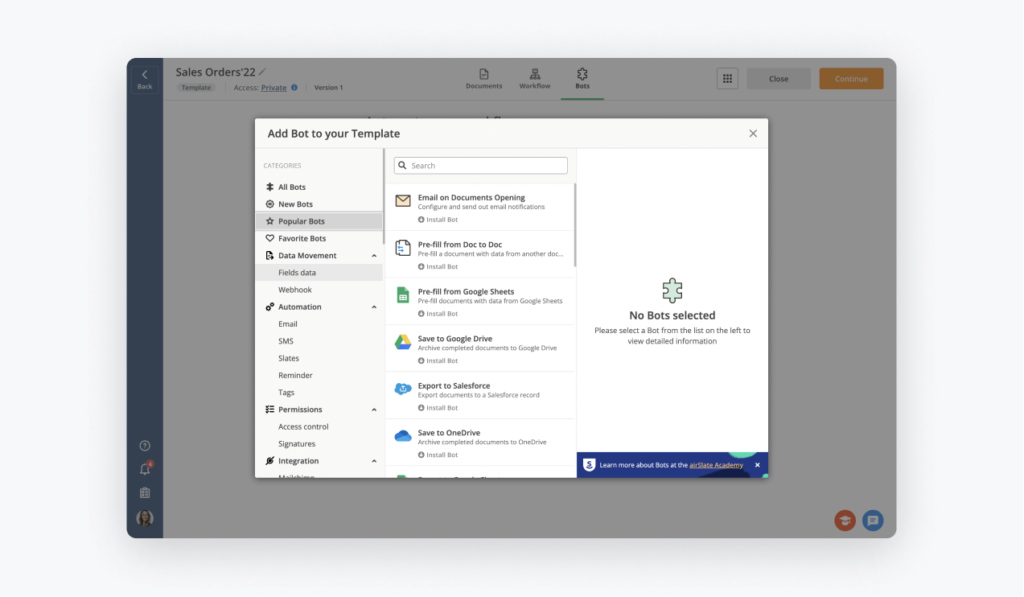
Once you’ve finished designing your workflow, proceed to the Bots tab and choose what actions you intend to automate for your workflow.
6. Create a Custom Button
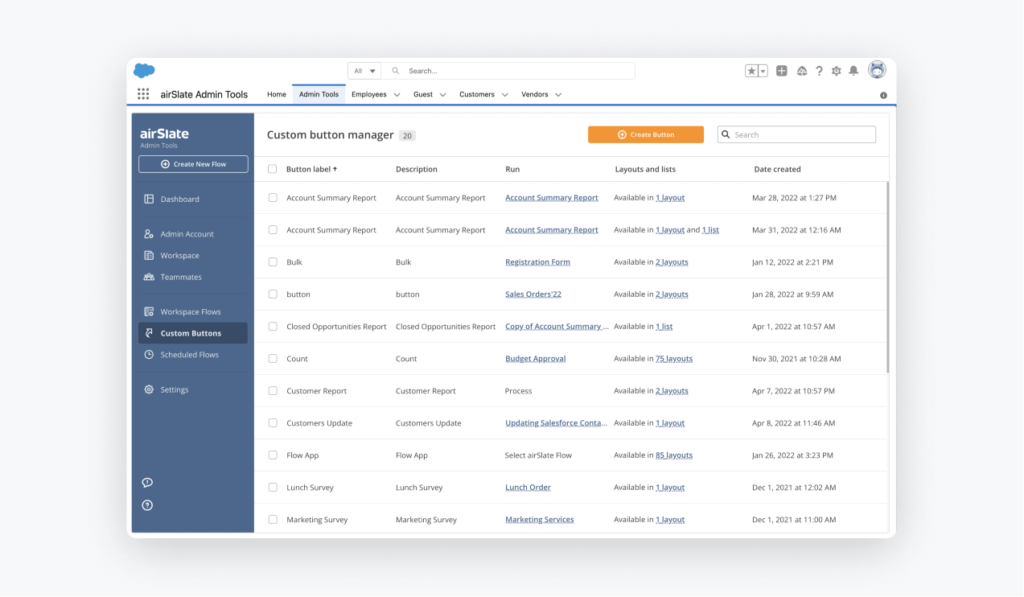
In Salesforce, open the airSlate Admin Tools (you can find it in the App Launcher) and create and customize a custom button according to your needs.
7. Start the process
In Salesforce, check the records you’ve added the custom button to and click on it to start the Template. You’ll be redirected to airSlate where you can start filling in the Flow.
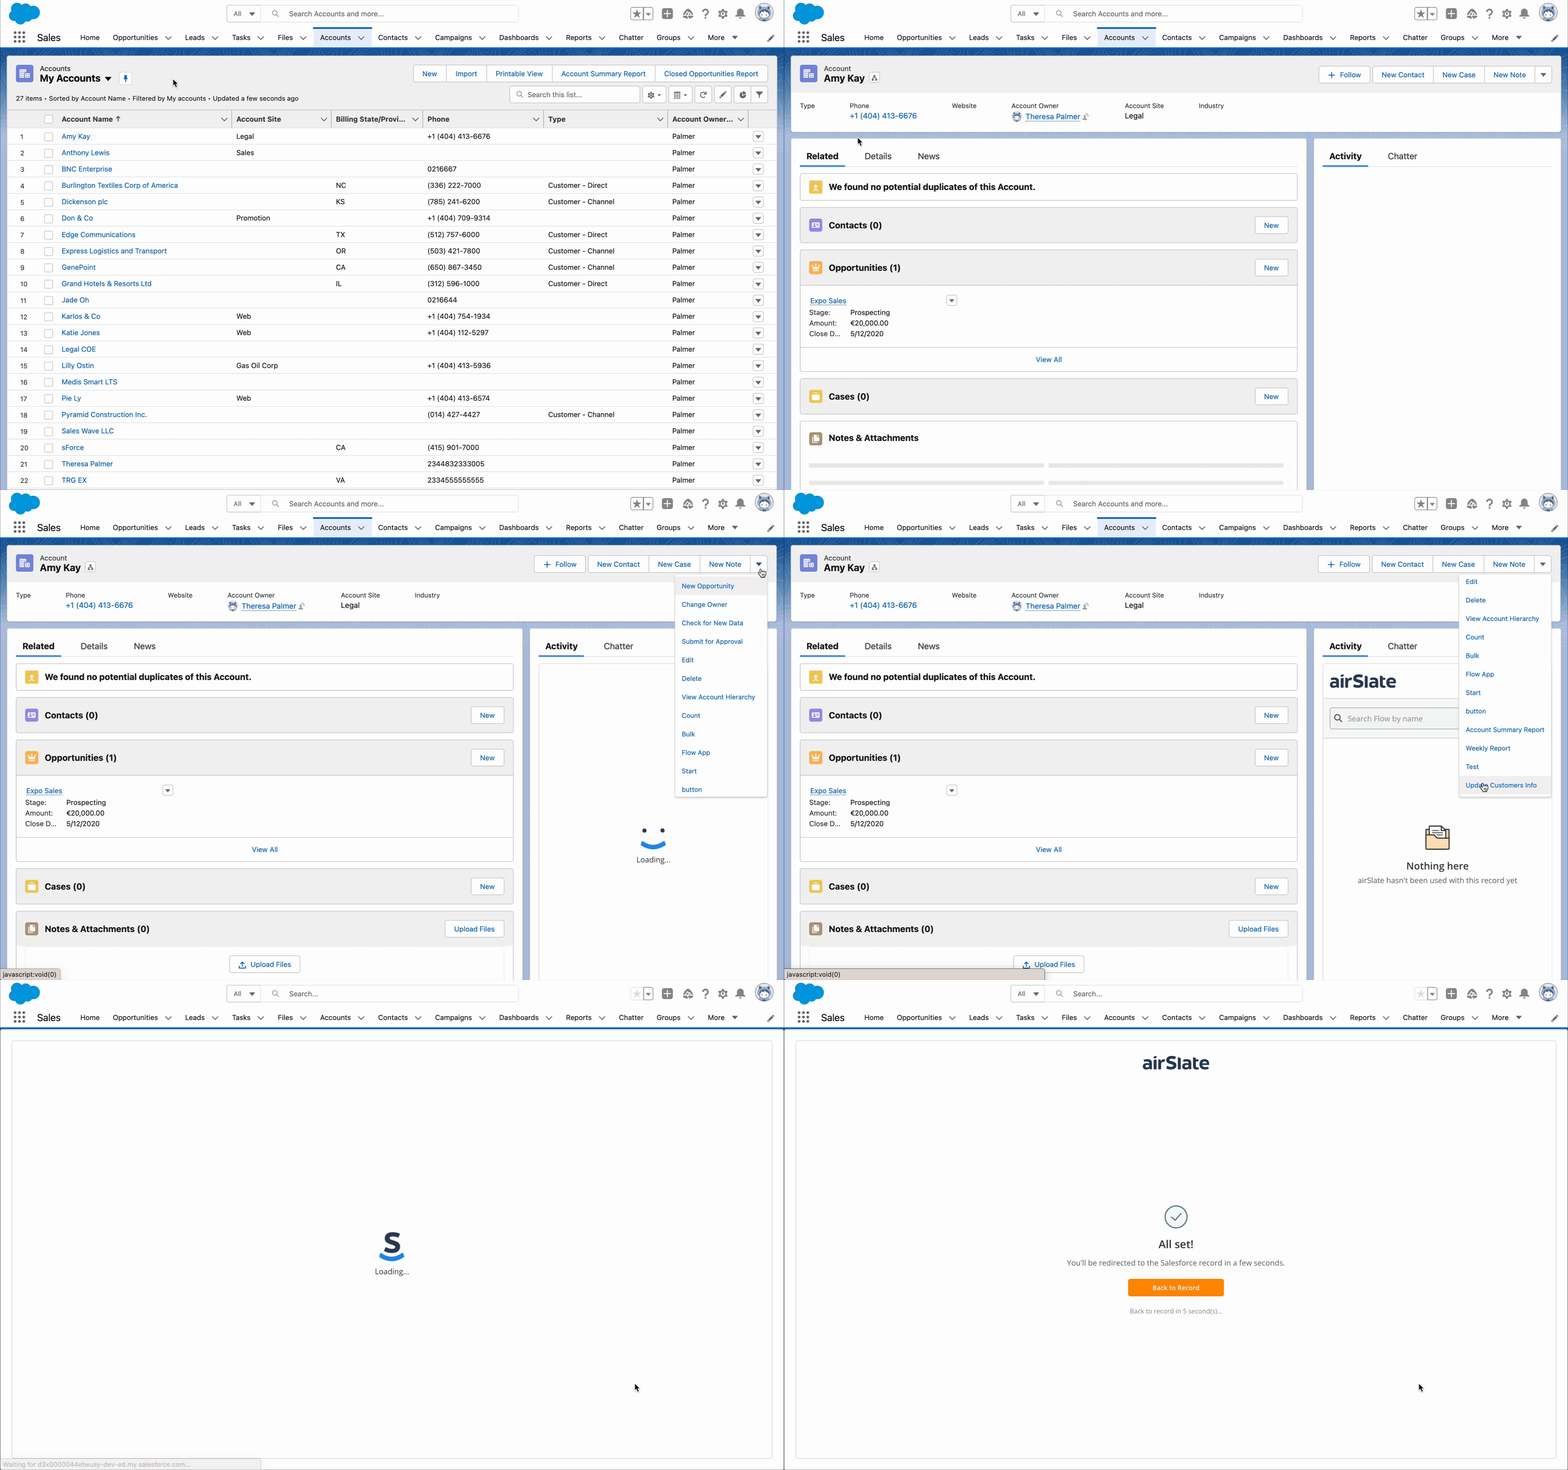
Check out some of the most popular Flow Templates for Sales to explore the possibilities of the Autostart option in airSlate for Salesforce:
- Sales Invoice Flow Template
- Sales Order Flow Template
- Order Delivery and Tracking Form Flow Template
You can learn how to set up time-based workflows in other CRM systems — MS Dynamics, NetSuite, and SharePoint. Enroll in the new Scheduled Workflows in airSlate course at the airSlate Academy to access detailed step-by-step instructions.

